
Welcome to this guide for building your own computer. If you're a beginner, don't worry, this guide is designed to walk you through it step by step, from selecting parts to first boot.
The components you need
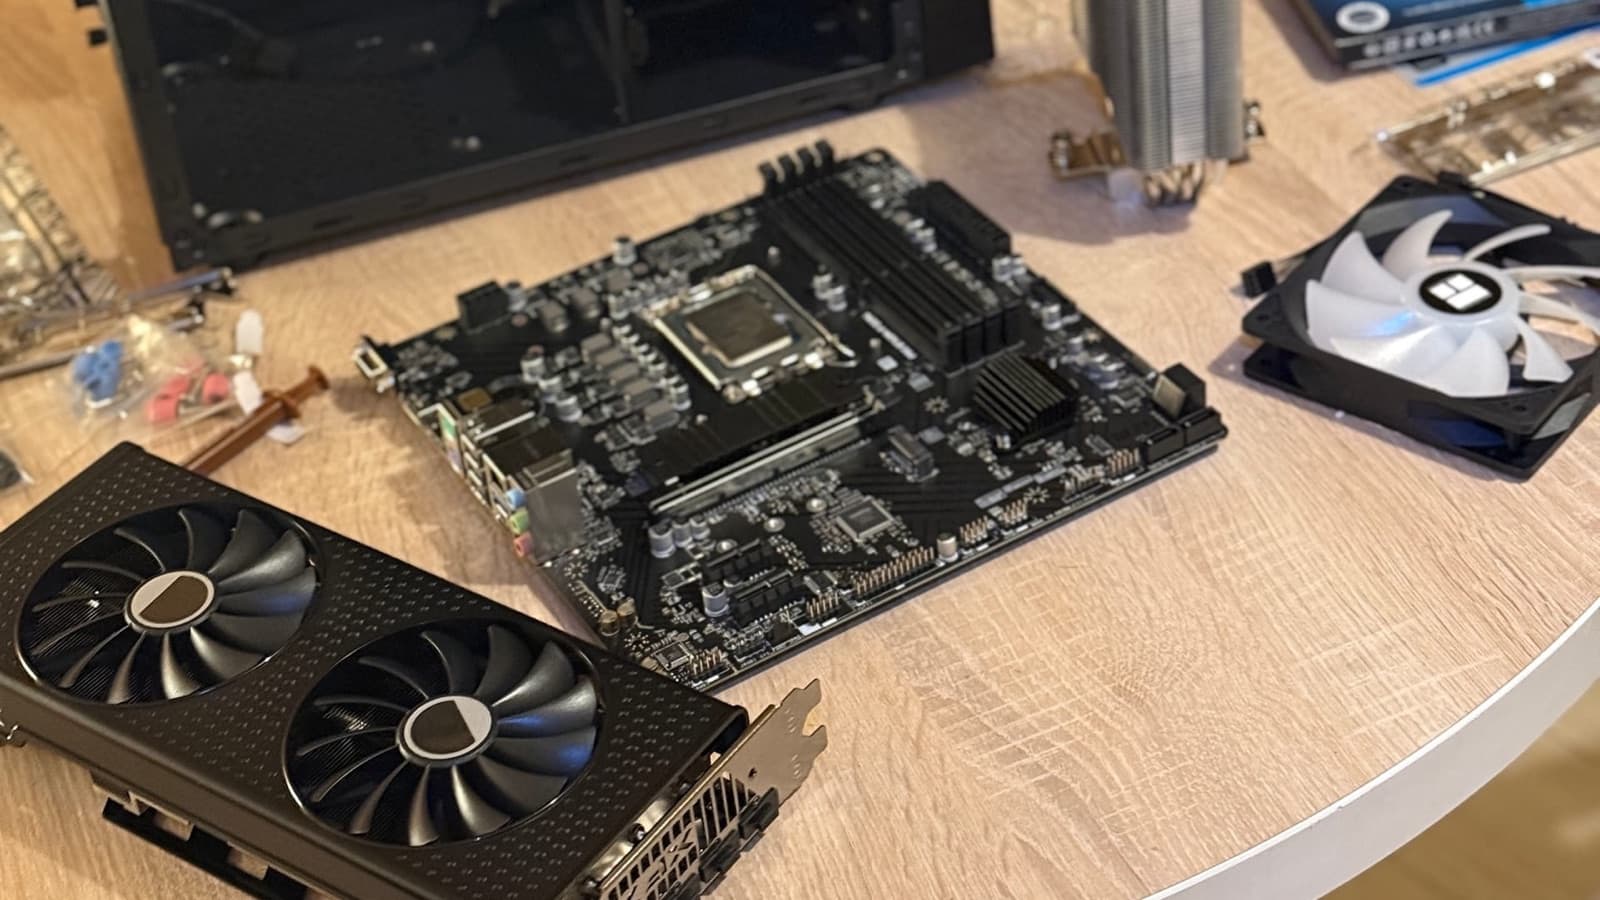
Before you start, make sure you have all of these gathered:
Before buying anything, check the compatibility of your components, particularly the processor socket with the motherboard's. Also calculate your power supply requirement via the Be Quiet calculator. Use PCPartPicker to verify everything automatically.
Budget estimate by use case
Prices from entry level to high end, published between 4 and 28 September 2026 depending on the source. With the memory shortage, the market moves every week: check again when you buy. Complete builds by budget, with their sources and the date of each, are in the gaming PC buying guide; the 16 GB RAM prices come from LaBonneConfig (28 September).
Build overview
- 1Prepare the case
- 2Prepare the motherboard
- 3Install storage
- 4Install the power supply
- 5Fit the motherboard
- 6Graphics card & peripherals
- 7Check and boot
Step-by-step build
Step 1 : Preparing the case
Open the case and remove the side panels. Place it on a stable surface. First thing to do: install the rear I/O shield (the metal plate supplied with the motherboard) in its slot, it's impossible to do once the motherboard is in place.
Step 2 : Preparing the motherboard
Install these items on the motherboard before placing it in the case : it's much easier:
- CPU: align the triangle/notch marker with the one on the socket, set it down without forcing, lower the lever
- Thermal paste: a pea-sized blob in the centre of the CPU (rice grain size)
- CPU cooler / watercooling: fit according to instructions, plug the cable into
CPU_FAN - RAM: insert in the correct slots (check the manual, usually A2/B2 for dual-channel), press down until you hear a click on both sides
On AMD, the correct slots for 2 sticks are almost always A2 and B2 (the 2nd and 4th from the CPU). On Intel, check the manual, some boards use a different order. Dual-channel doubles memory bandwidth: that's particularly important for Ryzen.
Step 3 : Installing storage
- NVMe M.2 SSD (recommended): insert diagonally into the M.2 slot, tighten the small retaining screw. No cables required.
- 2.5" SSD: screw into the bay, SATA data cable + SATA power cable
- HDD: screw into the 3.5" bay, same SATA cables
Step 4 : Installing the power supply
Slide the PSU into its bay (usually at the bottom) and screw it in. Route the cables cleanly through the dedicated cutouts now : it's harder once everything is fitted.
Step 5 : Fitting the motherboard in the case
Check that the gold standoffs are correctly in place (they must match the motherboard's mounting holes). Place the board by aligning the I/O ports with the shield, then tighten the screws progressively in a cross pattern : never all on one side.
Connect the connectors in this order:
| Cable | Connector on the motherboard |
|---|---|
| Main power | 24-pin ATX |
| CPU power | 4 or 8-pin (top corner of the board) |
| Front panel cables | Power SW, Reset, Power LED, HDD LED |
| Case USB 3.0 | Internal USB 3.0 header |
| Case audio | HD Audio |
Step 6 : Graphics card and peripherals
Remove the case's PCIe cover at the desired location. Insert the graphics card into the PCIe x16 slot until it clicks, then screw it in. Connect the 6 or 8-pin power cables if required.
If your CPU includes an integrated GPU (Intel UHD, AMD Radeon iGPU), you can boot without a dedicated graphics card to test the build. Add it later if needed.
Step 7 : Verification and first boot
Before closing up:
- ✅ 24-pin cable firmly seated
- ✅ CPU 8-pin cable connected (often forgotten!)
- ✅ RAM locked on both sides
- ✅ Cooler fitted and plugged into
CPU_FAN - ✅ GPU cable (if dedicated card)
- ✅ SSD connected (SATA) or screwed in (M.2)
Plug in monitor, keyboard, mouse. Power on. If the BIOS/UEFI appears: well done, the build is successful. Close the case and install Windows or Linux.
If the screen stays black but the fans spin: start by testing with a single stick of RAM in slot A2. Also check the 8-pin CPU cable, that's often the first thing to check, followed by the RAM slots.
AMD vs Intel : which to choose?
AMD Ryzen, Strengths
- ✓Excellent performance/price ratio
- ✓Better multi-threading (more cores)
- ✓Ideal for content creation, streaming
- ✓AM5 socket: guaranteed longevity
- ✓Integrated Radeon iGPU on some models
Intel Core, Strengths
- ✓High single-core frequencies (gaming)
- ✓Maximum software compatibility
- ✓Intel UHD iGPU on every model
- ✓Good motherboard availability
- ✓Integrated Arc GPU on Core Ultra
AMD compatibility : sockets & chipsets
| Socket | Chipset | Compatible processors | OC | Use |
|---|---|---|---|---|
| AM4 | A320 | Ryzen 1XXX–2XXX | No | Entry-level office use |
| AM4 | B450 | Ryzen 1XXX–5XXX | Limited | Gaming |
| AM4 | B550 | Ryzen 3XXX–5XXX | Yes | Recommended gaming |
| AM4 | X570 | Ryzen 3XXX–5XXX | Yes | High-performance gaming |
| AM5 | A620 | Ryzen 7XXX–9XXX | No | Budget office use |
| AM5 | B650 | Ryzen 7XXX–9XXX | Yes | Mid-range gaming |
| AM5 | B840 | Ryzen 8XXX–9XXX | No | Budget AM5 (2024) |
| AM5 | B850 | Ryzen 7XXX–9XXX | Yes | Improved mid-range gaming, USB4 (2024–2025) |
| AM5 | X670 / X670E | Ryzen 7XXX–9XXX | Yes | High-end gaming / creation |
| AM5 | X870 / X870E | Ryzen 9XXX | Yes | 2024–2025 flagship |
In 2026, for a new AMD build: the AM5 socket (B650 or B850 chipset, DDR5) leaves room to upgrade, with X870E for high-end configurations. AM4 is at end of life, but it remains the cheapest base for a small 1080p budget, with DDR4 (see the gaming PC buying guide).
Intel compatibility : sockets & chipsets
| Socket | Chipset | Compatible processors | OC | Use |
|---|---|---|---|---|
| LGA 1200 | B460 / B560 | 10th–11th gen Core i3/i5/i7/i9 | Limited | Office (end of life) |
| LGA 1200 | Z490 / Z590 | 10th–11th gen | Yes | Gaming (end of life) |
| LGA 1700 | B660 / H670 | 12th–14th gen Core i3/i5/i7/i9 | No | Office |
| LGA 1700 | B760 | 12th–14th gen Core i3/i5/i7/i9 | No | Mid-range gaming |
| LGA 1700 | Z690 / Z790 | 12th–14th gen Core i5/i7/i9 K/KF | Yes | Gaming / creation |
| LGA 1851 | H810 | Core Ultra 200 (Arrow Lake) | No | Budget office |
| LGA 1851 | B860 | Core Ultra 200 | No | Mid-range gaming (2024–2025) |
| LGA 1851 | Z890 | Core Ultra 200 (K/KF) | Yes | 2024–2025 flagship |
Intel in 2026: LGA 1700 (12th to 14th gen) is at end of life, like AM4; depending on the motherboard, it still takes DDR4, which can help a small budget or let you reuse existing modules. LGA 1851 (Core Ultra 200) only works with DDR5: in mid-August 2026, a 32 GB kit cost three to four times its early 2025 price (TopAchat), so include it in the budget.
Frequently asked questions
Where do I start to build my first PC?+
Is it hard to build your own PC?+
How much does a self-built PC cost vs a pre-built one?+
My PC won't boot after the build, what do I do?+
Do I need to install Windows after the build?+
Prefer to be guided through it?
Building a PC is doable alone, but there are two moments where many people get stuck: choosing components (compatibility, value, pitfalls to avoid) and booting the first build. If you want to avoid these snags, I offer two options.
Option 1 : you buy the parts, I build
You choose and buy your components yourself. I handle the full build at the workshop: CPU installation, RAM, SSDs, tidy cable management, thermal paste application, boot tests and BIOS configuration. If you'd like advice on choosing the components before you buy, that's possible for a consulting fee (price depending on complexity).
Labour: €70, excluding the operating system. Your components are assembled at cost.
Option 2 : Turnkey (I handle everything)
You tell me your budget and use case (gaming, office, creation, streaming…). I put together the optimal configuration, order the parts, build the PC and deliver a ready-to-use machine with Windows installed and up to date.
You have nothing to manage. Ideal if you don't want to deal with comparisons, compatibility or orders. Assembly labour: €70; Windows installation with setup: €45. When I handle the buying, I add a small markup that covers after-sales support. Details on the installation and build page.
Réalisations récentes
Configurations assemblées
Specs et prix réels tirés des factures — montage, câblage et installation Windows inclus
Config Gaming — RTX 5070
QHD fluide, prêt pour la VR et la création
Config Gaming Premium — RTX 5070 Ti
Watercooling 360 mm, 4K gaming ultra, streaming
A PC build project? Tell me your use case and budget, I'll prepare a custom config or build yours.
Related guides
9 min read
Gaming PC in 2026: which build for which budget
Gaming at 1080p, 1440p or 4K: what to aim for at each budget, the prices actually recorded in September 2026, and the pitfalls of a market shaken by the memory shortage. Advice from a technician who builds PCs in Poitiers.

7 min read
How to choose an SSD in 2025 — full guide
NVMe, SATA, M.2, capacity, brands… everything you need to choose the right SSD for your use and budget, explained simply.

8 min read
Boost your PC: 10 concrete actions to speed it up in 2026
A slow PC costs an average of 6 hours of productivity per month. Here are 10 actions ranked by effectiveness — from software cleanup to hardware upgrades — to get a fast PC back without buying a new one.